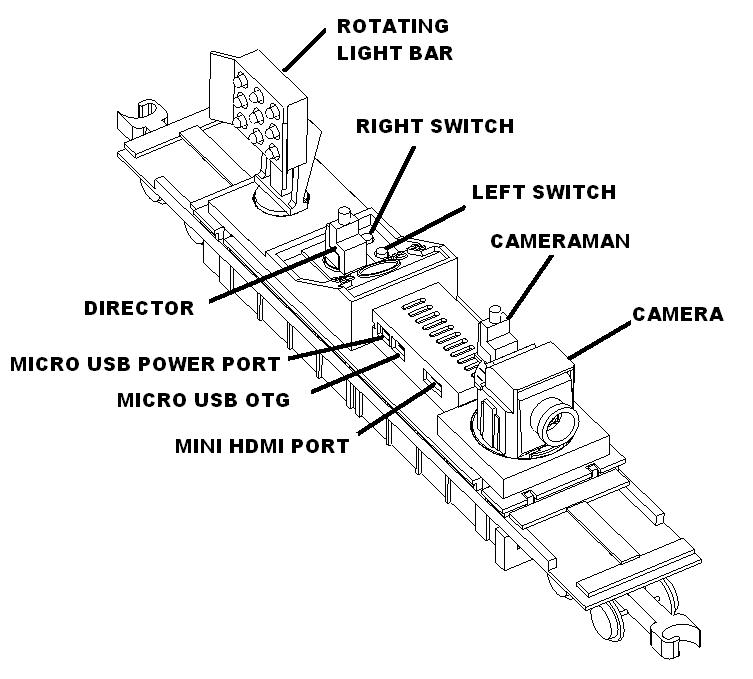
The camera train is a fun camera on wheels which rotates, tilts and takes videos and snapshots. It has a rotating spot light for night time illumination, a director, and camera man. The camera man is mounted on top of the camera so he can get the best shots. And the director is at the main control panel where he can give give orders to the camera crew.
Below is a overview of they key elements on your camera train.
Unpacking
Remove the top U piece with the label. Carefully remove the camera car from its package.
Power it up
Plug in the 5 volt micro USB power supply into an outlet.
Plug into the first port on the camera train. The port is upside down make sure you have it oriented correctly before inserting.
The camera train will power up. You will see its green light blink. This takes about 5 minutes. Once powered up it will say that animations are active.
Initial Setup
Add your credentials to USB drive
The “animator camera train” is a raspberry pi computer. To use it you must install it on your wifi network.
The camera train ships with a USB stick and USB to microUSB adapter. Plug the USB stick into your computer. Open the file called env.text the following will be displayed.
SSID=your ssid PASSWORD=your password PRIORITY=1 Enter your network SSID and password above. Priority sets which network will be tried first. Higher priority numbers will come first. For example a 10 will come before a 1. The max priority number is 99.
Enter your SSID and PASSWORD where is says “your ssid” and “your password”.
Leave PRIORITY = 1.
Save the file and eject the drive.
PRIORITY is used to give certain SSIDs higher priorities than others. So if you make a mistake and it does not load onto your network you can use the next value 2. Also it can be used to add more than one SSID to your camera train. For example if you were going to use it at someone else’s house or a club layout.
Plug USB drive into your camera train
Insert the usb drive into the micro usb adapter and then into the second port on the camera train. The green light should blink and mount the drive. It is complete when the green light is solid.
Load the SSID and password on the camera train
To load the ssid and password on the camera train press the right button and a message will play “main menu press left button to scroll through items press right button to select the item”.
Press the left button until your hear “webpage options” then press the right button.
A message will play “web page menu press left button to scroll through items press right button to select the item”
Press the left button until you hear “Update SSID and password from USB drive” then press the right button.
A message will play “Updating SSID and password from USB drive” and then “restarting animator camera train”.
The camera train will restart and it will announce its on your network. To access it type in
“animator-camera-train.local:8083” in your browser for camera cars shipped before April 2026
“animator-camera-train.local” in your browser for camera cars shipped April 2026 and after
MAKE SURE YOU UNPLUG THE USB DRIVE !!!
If successful a page like below with load. Have fun animating!
Taking video and snapshots with your camera train
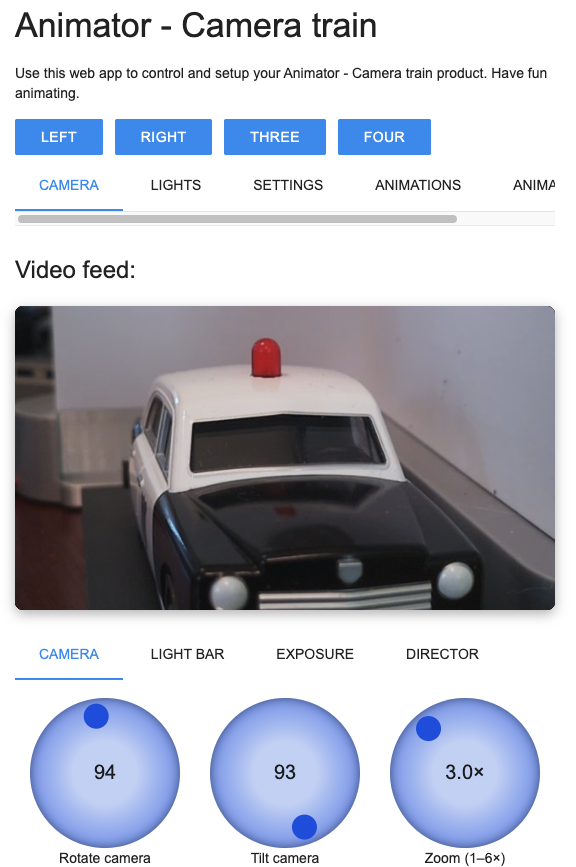
To access your camera train type in “animator-camera-train.local:8083” in your browser on your phone, tablet or computer. The following web page will be displayed.
The webpage has five tabs, camera, lights, settings, animation and animation table. Most of your time will spent on the camera tab.
The camera tab has sub tabs, camera, light bar, exposure and director.
Camera
On the camera sub tab you have the following knobs and buttons
Rotate camera: rotates the camera, counter clockwise is left, clockwise is right
Tilt camera: tilts the camera, counter clockwise is up, clockwise is down
Zoom: zooms the camera, note: beyond 3x is digital zoom and you will lose resolution
Focus: manually focuses the camera
Focus once: will autofocus once and the focus will be set at that value
Focus continuously: will autofocus continuously
Start recording will start the recording to the pi computer.
Stop recording will stop the recording and add a thumbnail to the video section
Snap shot will take a high resolution picture and put a thumbnail of that picture in the snapshot section.
Note: zoom only applies to videos not snapshots
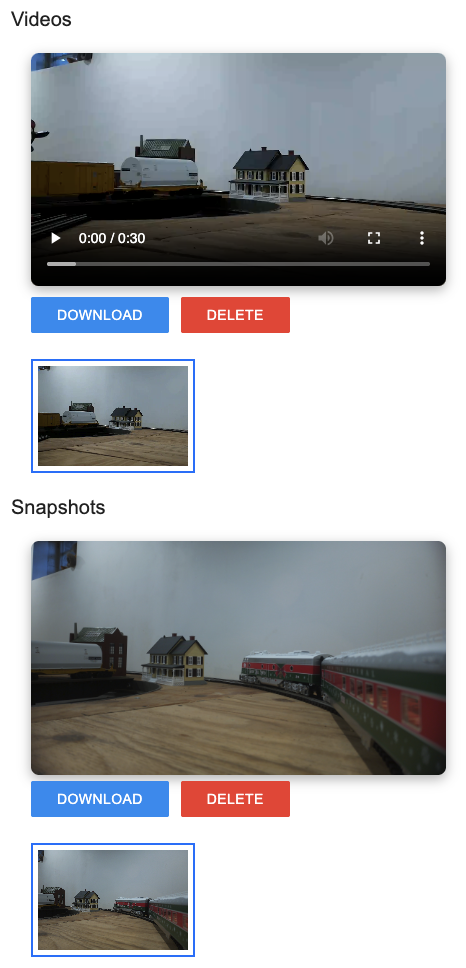
If you scroll down on the camera page you will find your videos and snapshots. Click on the thumbnail you want. If you press the download button you will be able to download to your phone or computer.
Note: The current release of software only lets you download videos to your iphone. The playback screen is disabled.
Delete will delete the video or snapshot. This is irreversible so only do this after you have downloaded the content you want.
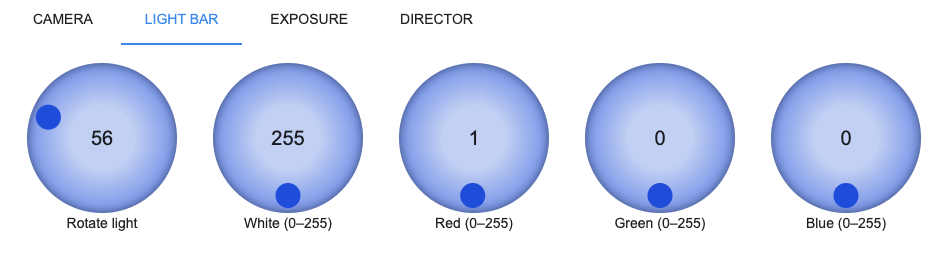
Light bar
On the light bar sub tab you have the following knobs and buttons
Rotate light: rotates the light, counter clockwise is left, clockwise is right
White: Adjusts the white light intensity
Red: Adjusts the red light intensity
Green: Adjusts the green light intensity
Blue: Adjusts the blue light intensity
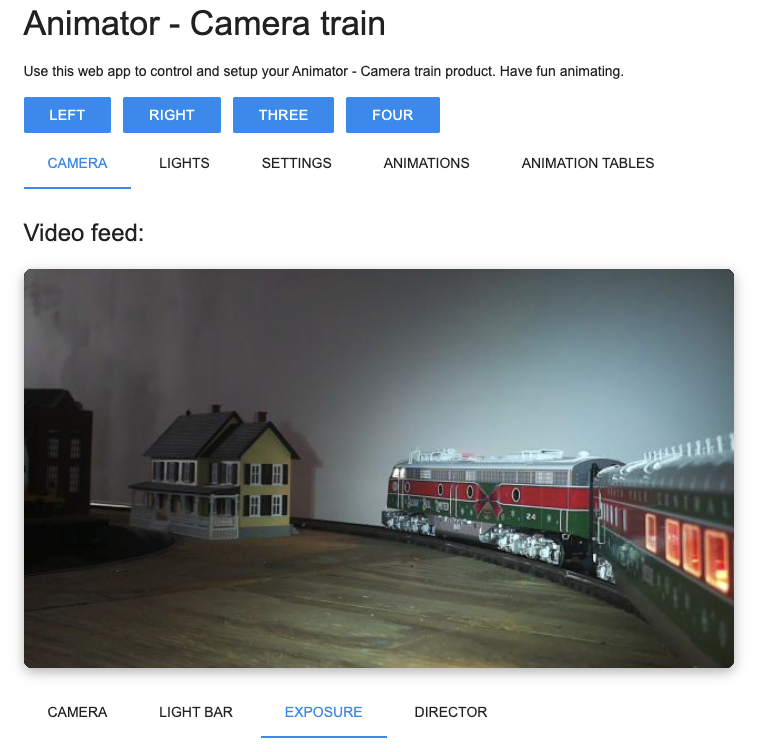
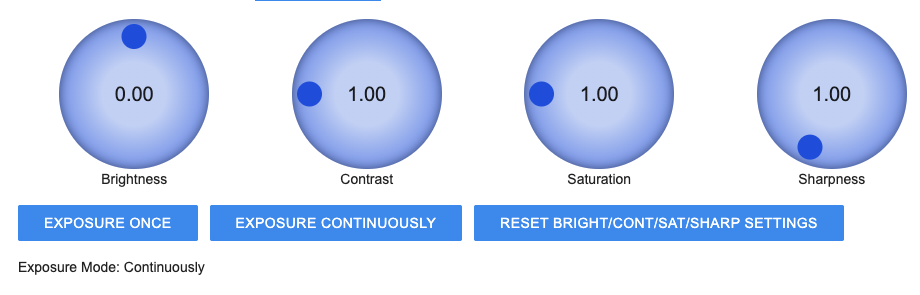
Exposure
On the exposure sub tab you have the following knobs and buttons
Brightness: adjusts the brightness, the default is 0.0
Contrast: adjusts the contract, the default is 1.0
Saturation: adjusts the color saturation, 0.0 is black and white
Sharpness: adjusts the sharpness, the default is 1.0
Exposure once: will adjust the exposure for your current lighting and not change anymore
Exposure continuously: will adjust the exposure continuously
Reset brightness…: Will reset all the knobs to the default values
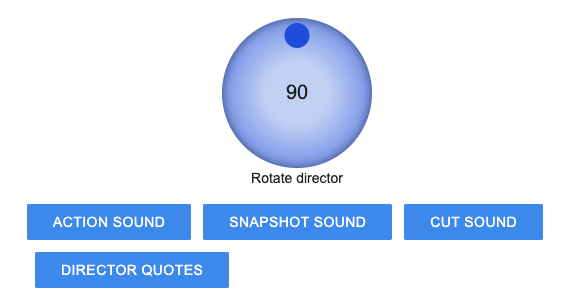
Director
On the director tab you have the following knobs and buttons
Rotate director: rotates the director figure
Action sound: plays action sounds
Snapshot sound: plays snapshot sounds
Cut sound: plays cut sounds
Director quotes: plays quotes from famous directors
Main menu
Press the right button to get into the main menu options.
Pressing the first button will scroll through the different options. When you hear the option you want press the second button.
Further instructions will play for each menu option.
If the menu has an “Exit this menu” option, use that to get back to “animations are now active”. Menus without the “Exit this menu” option will automatically go back to “animations are now active”.
Menu summary
Choose Sounds
Angels
Demo
Elfs trolley
Joyfulsnowman
Volume level adjustment
Left button lower volume
Right button raise volume
Press and hold the right button until you hear “all changes complete” to save the volume setting
Webpage options
Hear web url
Hear ip address, useful when setting up VNC
Update SSID and password from USB drive
Exit this menu, choose this option to exit the menu
Webpage options
Web page on
Web page off
Hear web url
Hear instruction on how to enable web access
Exit this menu
Add my sound or animate them
Hear instructions
Time stamp mode on
Time stamp mode off
Exit this menu
Exit this menu
Set up VNC
If you want more control over your camera train, you can remote into using VNC viewer. You can also use this tool to transfer media files to your “camera train”.
You can download and install VNC viewer from this website. VNC viewer. Note: You just want the free viewer. You don’t need to pay for anything.
The install screen should like like something like this.
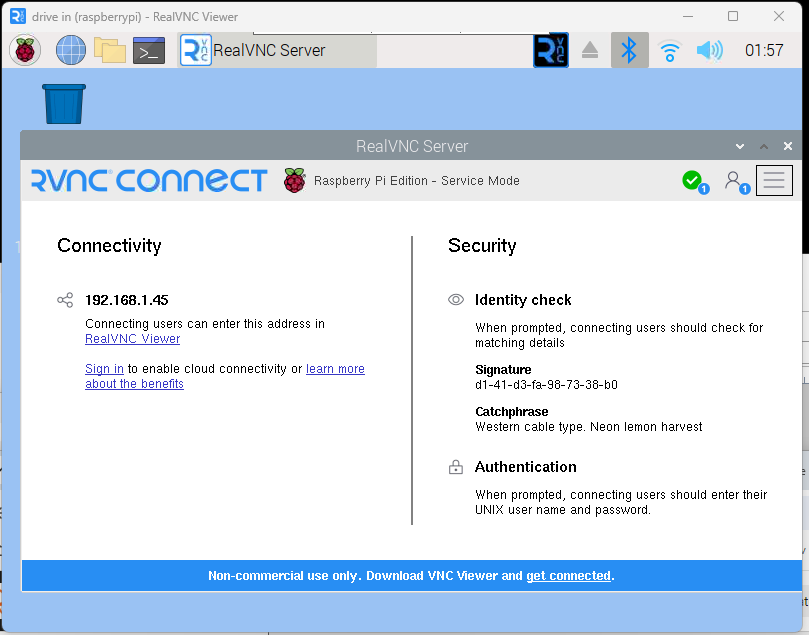
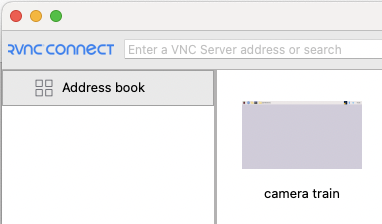
Once it is installed. Start it and it will look something like the following.
We need to establish a new connection to your raspberry pi. To do this we want to know the ip address of the pi on the network. So using your portable keyboard go to the VNC icon on your drive in screen. Select that and it will show the ip address as shown below. In my example it is 192.168.1.45.
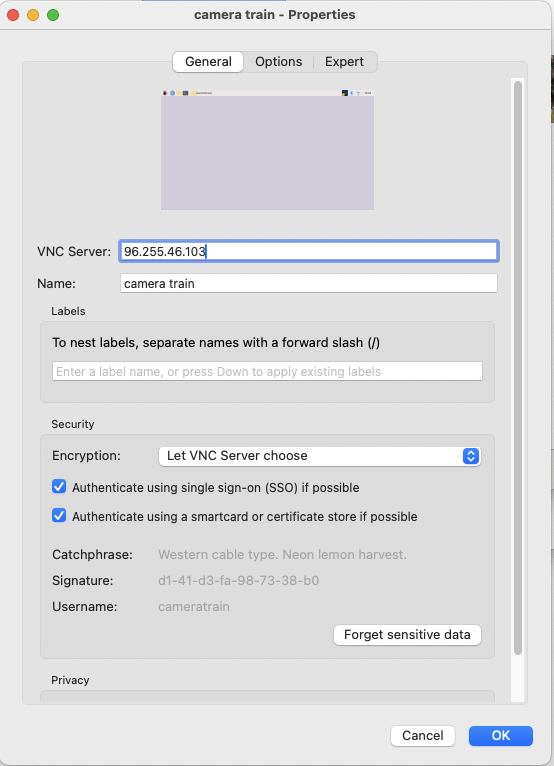
Then on vnc viewer on your computer choose new connection. I choose to give it “cameratrain” as the name. Click ok.
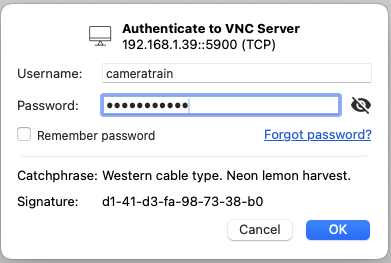
Click Ok and the following screen will display.
Click the icon and enter “cameratrain” for the username and “jimmytrains” for the password.
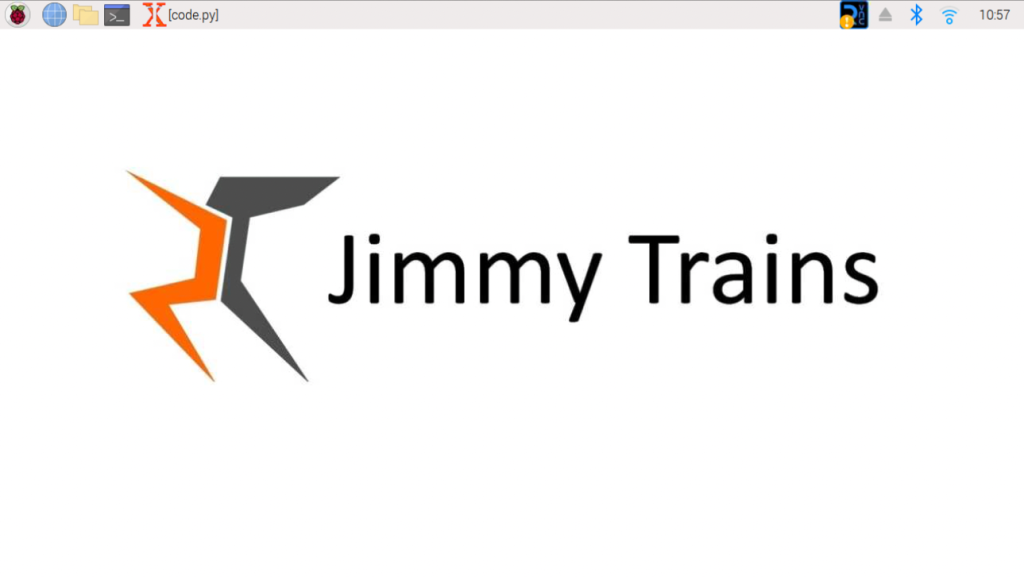
You are now have accessed the pi user interface on your computer. How cool is that?
Put your own media on your Camera train
Adding music
To add your own music onto the animator you can do this by first converting your music to a wav file encoded with a sample rate of 22050 Hz and a sample format of 16-bit. They must be in stereo. Also you want to normalize all songs to -10db. This prevent them from being clipped at the highest volume level on the camera-train.
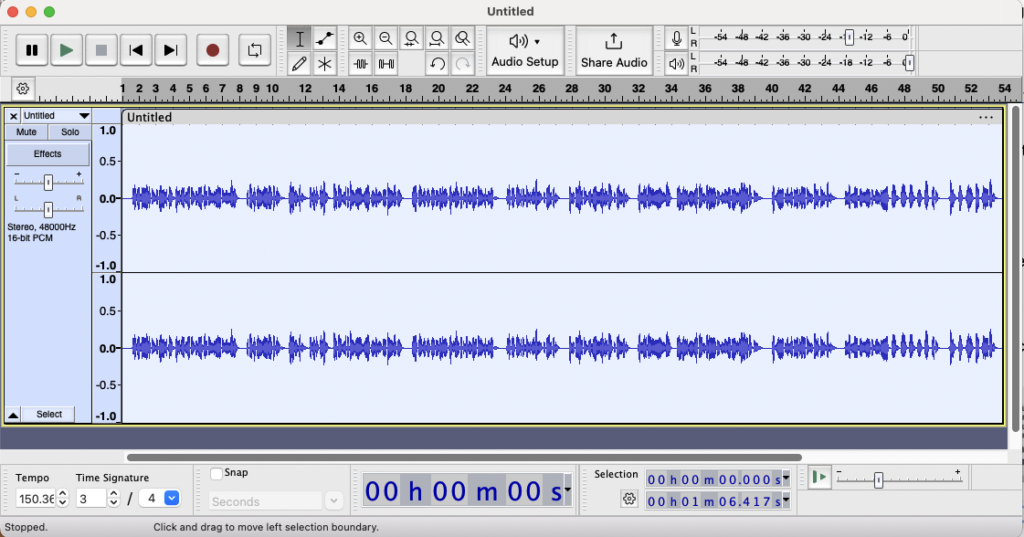
Once you have installed audacity open the music file that you want to put on the animator.
Note: Your screen might be different than the one below. See audacity documentation for details.
Choose select all under the select menu. The select area will be white like shown below.
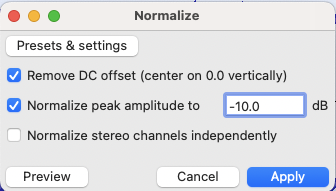
Then under the “effect” menu select “volume and compression/normalize”. The following will be displayed. Normal to a peak amplitude to -10.0 db and press “Apply”.
Then go to the file menu and choose export/export as wav. On the export audio screen change the sample rate to 22050 as shown.
Then save the file to a folder that you will later transfer to the animator drive-in. Name the file with lower case letters and spaces like “my music file.wav”.
Repeat this for the rest of your songs.
Once you have all your music created transfer them to the animator using VNC. See “transfer files using vnc” for instructions.
Media folder
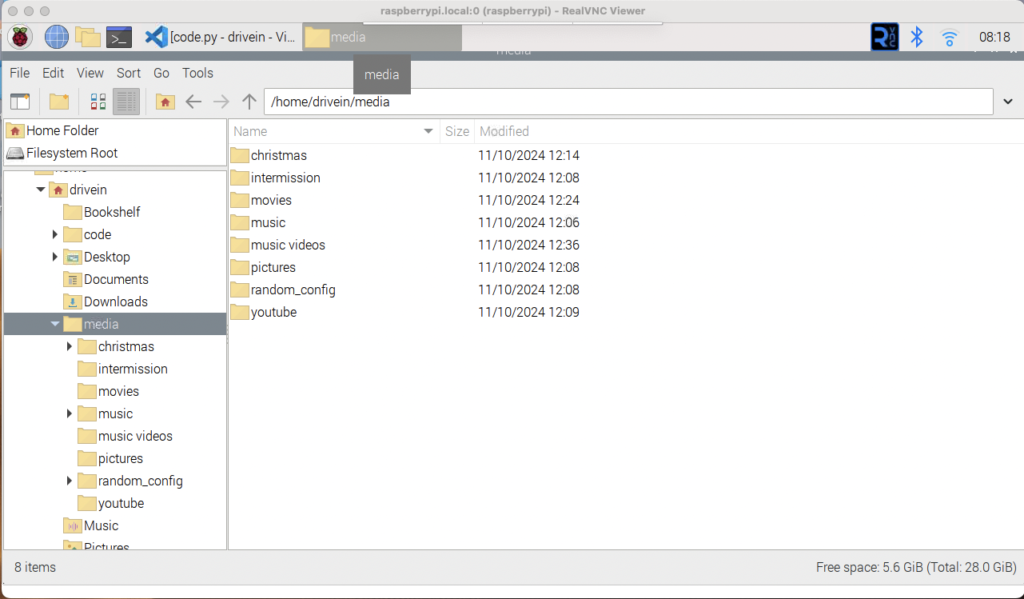
All the media for the camera-train is stored on the animators hard drive as shown below.
The media folders are:
animations
The folders random_config and pictures are system folders and should never be removed or deleted. They are used by the software.
You can add you own media folders too. Just create a folder in the media directory. Use lower case letters to create your folder and then put wav or mp4 files in this folder.
When you restart your Animator camera train it will scan for file names and add them to the “choose sounds” menu.
The Animator will translate the file name into a spoken name if the internet is available. If not, it will call it song 1, song 2 etc.
Transfer files using vnc
Log into your vnc connection to your “camera-train”. The following will be displayed. Hover over the top center of the screen. The VNC menu will pop up. Select the icon with the arrows.
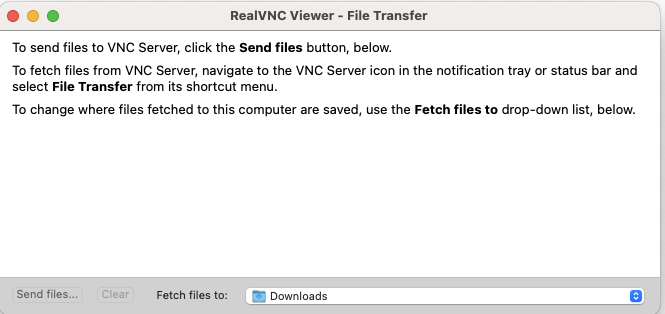
The following file transfer screen will display.
Press “Send files”. The following will display. Choose folder or files to transfer. They will then be copied to the desktop.
Move your files to the media folder by cutting and copying. Its important that you cut these files because you might run out of space during the move. The camera train hard drive capacity for media is about 15GB. Do not exceed this amount.
We use cookies to ensure that we give you the best experience on our website. If you continue to use this site we will assume that you are happy with it.