
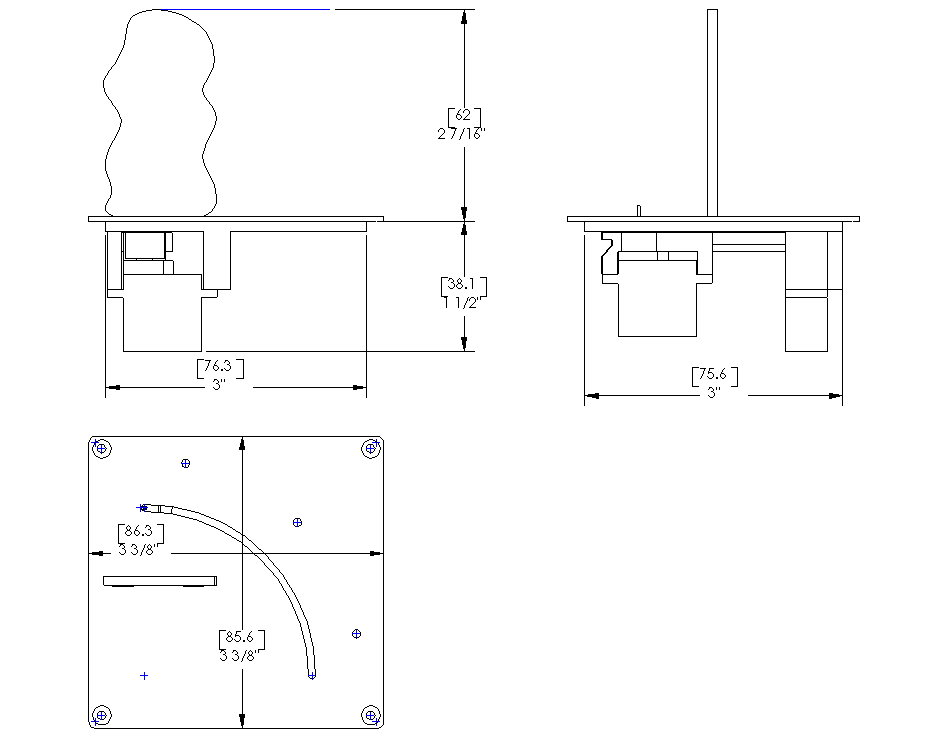
Product dimensions O
Unpacking items
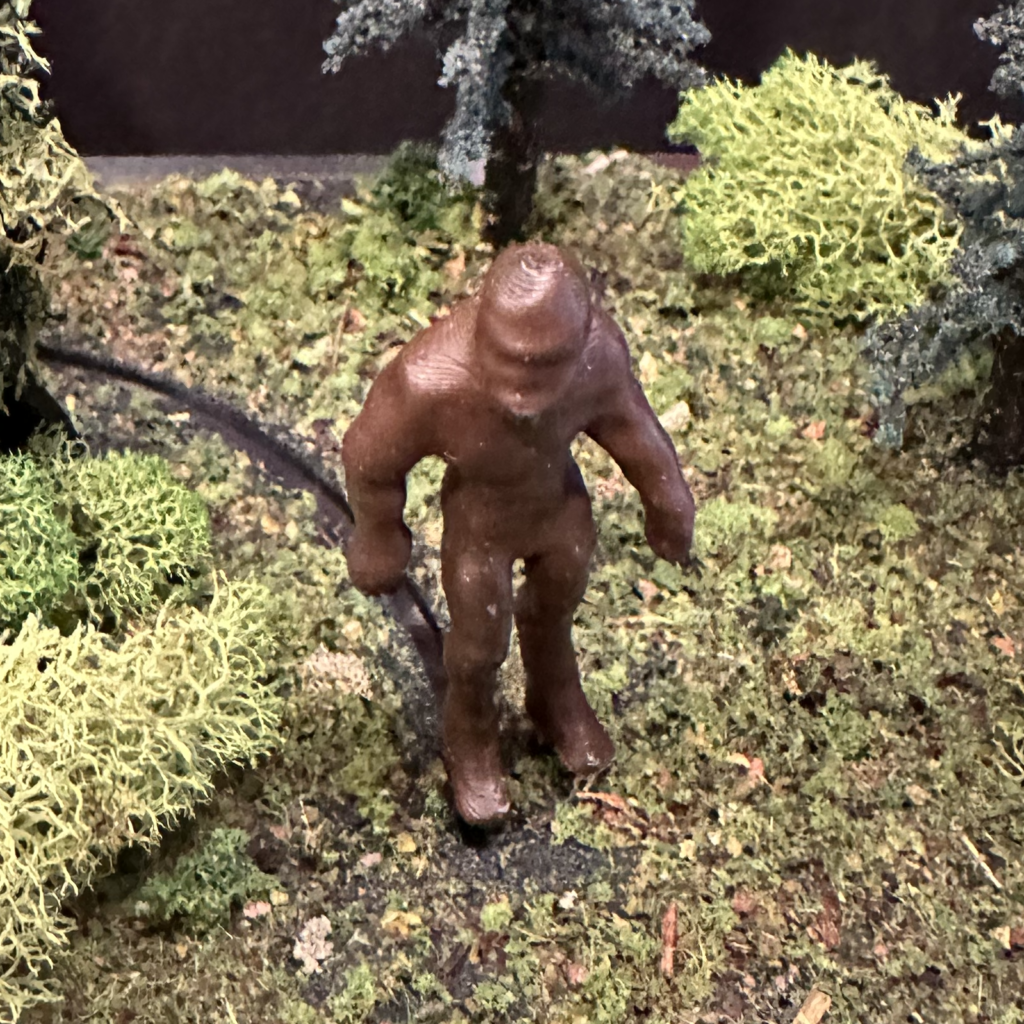
Carefully remove the big foot from its box.
You should have the following parts.
- AN2SND control module
- Big foot figure
- Servo base
- Hiding wall
Power it up!
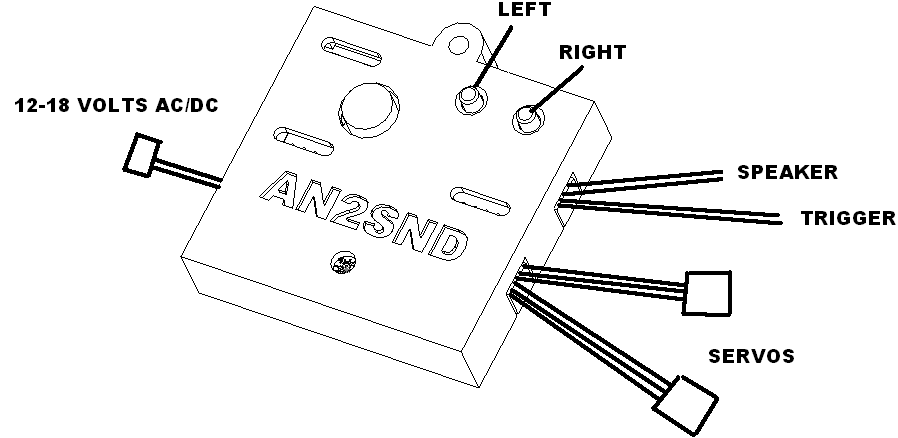
First connect the rotating arm servo to SERVO1 connector from the AN2SND. Make sure you match the wires on the connectors. Repeat for the figure rotating servo to SERVO2, this is mounted to the rotating arm.
Connect the speaker to the wires marked SPEAKER.
Then connect the power wires marked 12-18 V AC/DC to a AC or DC power supply.
Everything should now be connected. Plug in the power supply. The rotating arm should move out and then in and the figure rotating platform should rotate to be inline with the slot. Then it should announce “Animations are now active”
Start the animation by pressing the “left” or “trigger” button, and you will see the animation start.
Find a location in the forest for big foot. It best to hide big foot since he is not often sighted!
Find a location for your big foot animation
Your big foot animation can be mounted in a hole slightly larger than 3″ X 3″. Use no 2 or no 4 screws to fasten it dow or you can fix it to your layout using a dab of removable glue.
The AN2SND module can be installed under the layout using the mounting hole provided. It is sized for a number 6 sheet metal screw.
Make sure big foot can be easily accessed or removed. So you can change settings, software or service it.
Mount the figure
Unplug the power supply if plugged in. Plug in the power supply.
The AN2SND control module will initialize and set the platform to the “rest” position for 5 seconds. Immediately unplug the power supply so that is stays in the “rest” position.
Mount your figure at the “rest” position facing forward by inserting it rod into the slot. It is a press fit. If you want to remove the figure use a long needle pliers to pull him out by the rod. Otherwise the rod might pull out of the figure.
Mount the hiding wall
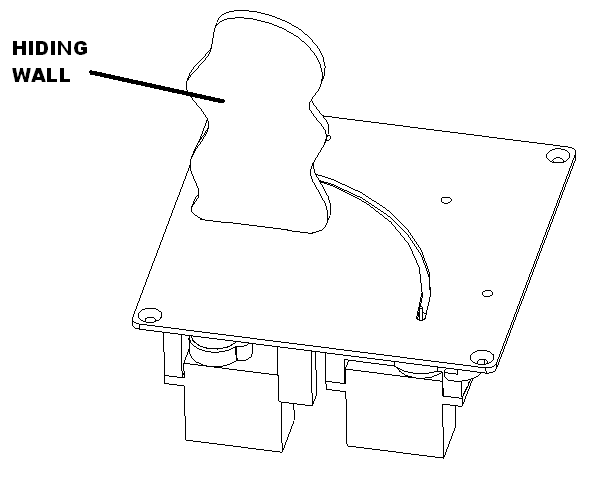
A hiding wall is provided to hide big foot. Insert it into slots as shown and scenic it as desired.
Operation
There are four buttons on the AN2SND. The “left” button activates the animation. The “right” button activates the main menu. The “trigger” button is used on show displays where you want visitors to press to activate the animation only and not be able to change anything.
The button on the bottom is used for loading a new operating system on the controller. It will not be used.
Deactivate timer mode
To deactivate press and hold the “left” button down until you until you see the big foot move one time at the “middle” position. This indicates that “timer” mode is “off”.
If timer mode is already off it will just run the animation.
Activate timer mode
To activate press and hold the “left” button down until you until you see the big foot move two times at the “middle” position. This indicates that “timer” mode is “on”.
Main menu
To activate the main menu the timer mode must first be inactive. Deactivate using the instructions “Deactivate timer mode”.
If you press the “right” button the big foot will announce “Main menu press the left button…”
Next press the “left” button to scroll through the different options. Various announcements will be made indicating the step you are on.
The menu commands have the following structure.
- Timer settings
- Timer off (i.e. pressing the left or trigger button activates the animation)
- Timer 0 seconds (i.e. continuous operation)
- Random between 0 and 5 seconds
- Random between 5 and 10 seconds
- Random between 10 and 20 seconds
- Timer every 5 seconds
- Timer every 10 seconds
- Timer every 20 seconds
- Volume settings
- Volume level adjustment
- Lower volume
- Raise volume
- Hold the right button to commit changes
- Volume pot off
- Volume pot on
- Volume level adjustment
- Exit this menu
Choose options menu
Once you have reached the setting you want. Press the “right” button. The big foot with confirm with “all changes complete”.
Have fun animating!
Adjusting hidden and visible locations
The product comes shipped with the “hidden” and “visible” rotating arm limits set from the factory.
If you want to adjust these you can do it as follows.
To set the “hidden” and “visible” locations first unplug the power supply.
Then press and hold the “left” button.
Continue to hold in the button and plug in the power supply. Continue holding until you see big foot start to move. Release the button. It should cycle four times at the middle position which indicates that it is in limit adjusting mode. Then it will move to the “hidden” position.
Press the “left” button to move the figure to the rearward and the “right” button to move the figure to the forward.
Once you are satisfied with your adjustment press and hold the “right” button until the figure starts to cycle forward and backward.
Then it will move to the “visible” position.
Press the “left” button to move the figure to the rearward and the “right” button to move the figure to the forward.
Once you are satisfied with your adjustment press and hold the “right” button until the figure starts to move forward and backward.
Test the settings by pressing the “left” or “trigger” button.
Media files
The animator has three folders on the device which holds various media. They are short phrases or sounds in three different folders.
- Intro
- Bigfoot
- Ending
The Intro folder contains phrases like “Did you hear something?” and “I heard there’s a Bigfoot in these woods.” These phrases are played before Bigfoot even appears.
The Bigfoot folder contains Bigfoot sounds that play when he appears or disappears.
The Ending folder contains phrases like “Let’s get out of here!” and “I think he’s lonely.” These phrases are played after Bigfoot leaves.
The sounds are played randomly throughout the animation. Both the frequency and the specific sounds are randomized, and sometimes no sound is played at all. This keeps the animation feeling natural, fluid, and less repetitive.
Creating media files
You can customize your device by adding your own media to your Animator Bigfoot. Short phrases work best for the animation because they help maintain the element of surprise and keep the action moving.
Animator Bigfoot has onboard flash memory with limited storage capacity, so choose the best phrases and sounds you can think of.
To add your own audio, first convert your files to MP3 format with a sample rate of 22,050 Hz and a bitrate of 24 kbps. The audio files must be stereo.
You can do this with audacity a free application. https://www.audacityteam.org/
Once you have installed audacity open the music file that you want to put on the animator.
Then go to the file menu and choose export/export as mp3. On the export audio screen, change the sample rate to 22050 and the quality to 24 kbps as shown.
Note: Your screen might be different than the one below. See audacity documentation for details.
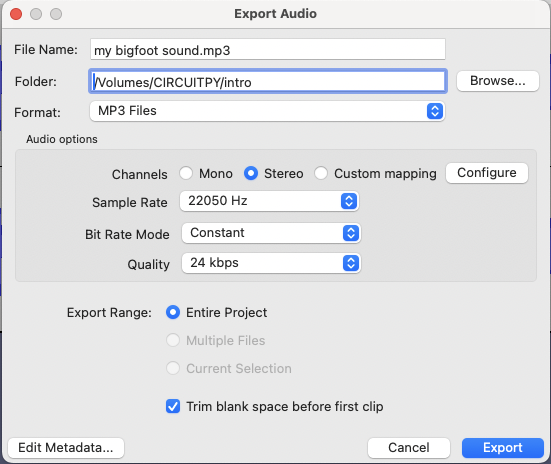
Then save the files to the folders on your computer named intro, bigfoot or ending. These will be moved to the animator later.
Repeat this for the rest of your songs.
Adding media files to your animator
Remove you animator from your power supply. Insulate the wire ends.
You need a USBA to microUSB cable to add files to your animator.
Plug in the USBA cable to your computer.
Next hold down the right button and plug the microUSB cable into the animator, continue holding down until you see CIRCUITPY drive on you computer.
Make a backup of this drive before making any changes.
The drive will look like below. Install your files in the intro, bigfoot and ending folder.
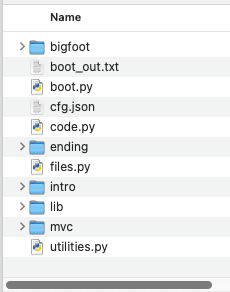
When finished eject the drive and unplug the animator.
Then power up your animator with your transformer.