
Front side connections
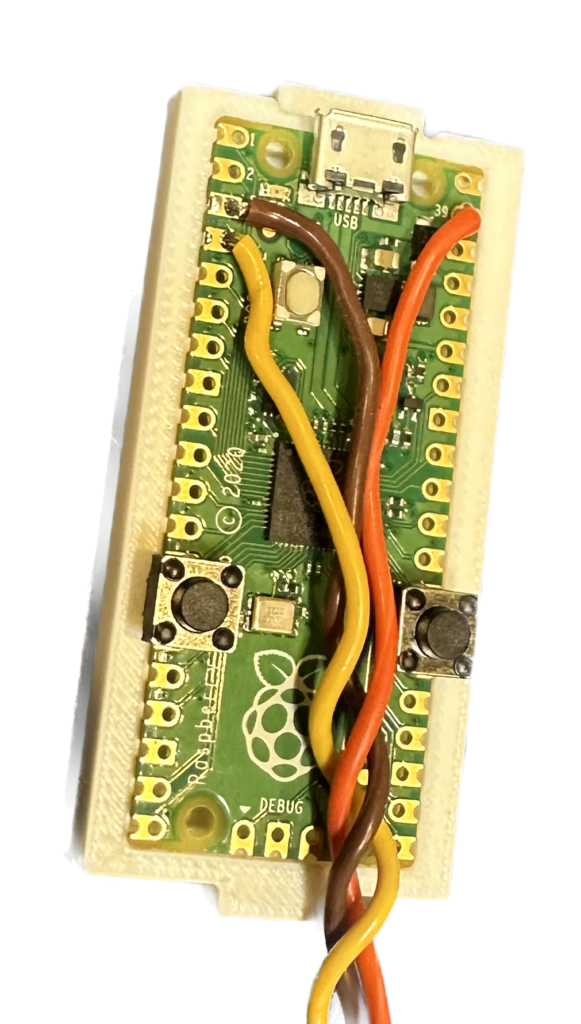
The front side of the raspberry pi pico.
Switches
Solder two switches to the raspberry pi pico as shown
| Function | Connect to |
| Bottom switch | GND and GPIO11 |
| Top switch | GND and GPIO20 |
Servos
Cut female servo harnesses to 6″ lengths. Label female ends with SERVO 1.
Solder to the animator using the following table.
| Connect to | Cable Color |
| GND, pin 3 | BRN |
| GPIO2, pin 4 | YEL |
| 5V, pin 39 | RED |
Controller assembly
Insert the buttons in the controller cover as shown. Tape them in place on the outside.
Place the board into the controller base. Route the wires to be out of the way of the buttons.
Snap cover on.