
Front side connections
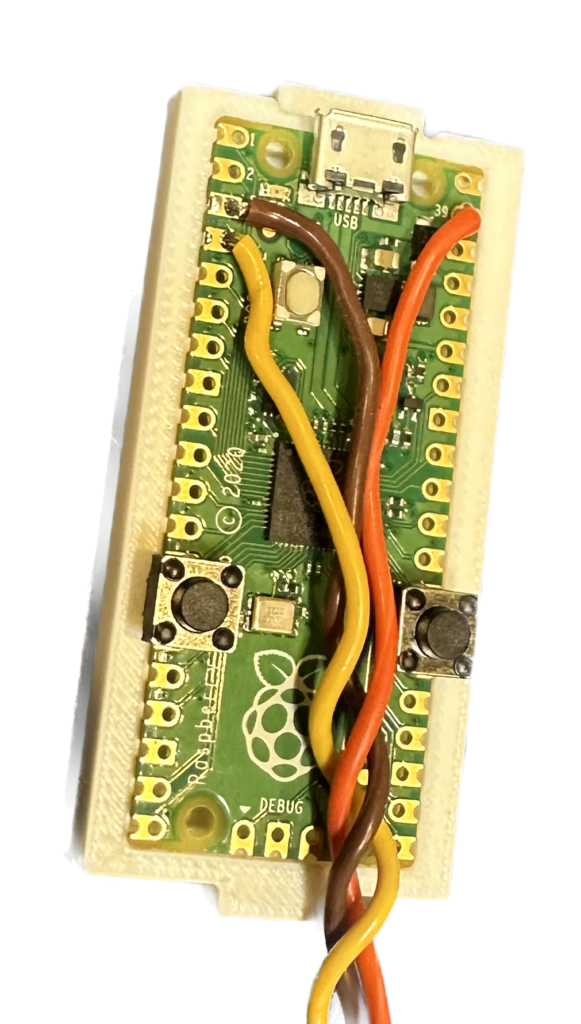
The front side of the raspberry pi pico.
Switches
Solder two switches to the raspberry pi pico as shown
| Function | Connect to |
| Bottom switch | GND and GPIO11 |
| Top switch | GND and GPIO20 |
Servos
Cut female servo harnesses to x” lengths. Label female ends with SERVO 1.
Solder to the animator using the following table.
| Connect to | Cable Color |
| GND, pin 3 | BRN |
| GPIO2, pin 4 | YEL |
| 5V, pin 39 | RED |
Actuator assembly
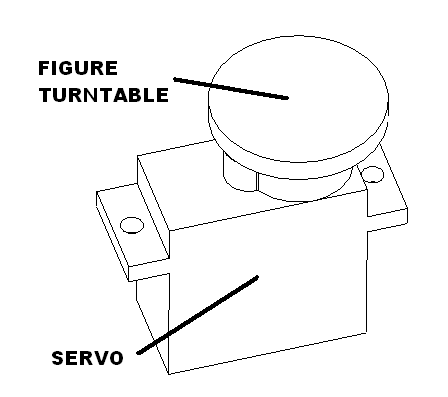
Press figure turntable onto the servo as shown.
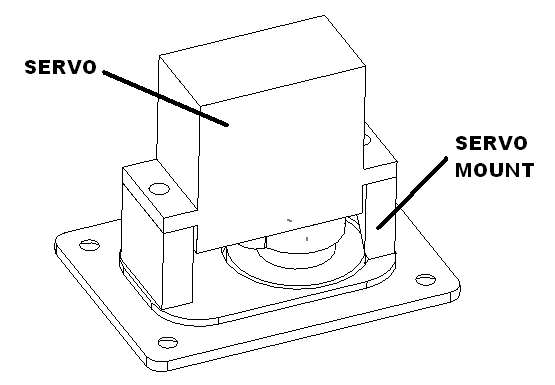
Mount to the servo mount with the screws provided.
Controller assembly
Insert the buttons in the controller cover as shown. Tape them in place on the outside.
Place the board into the controller base. Route the wires to be out of the way of the buttons.
Snap cover on.
Test
Plug in the servo into the controller.
Hold the pico program button down and plug in the microUSB computer cable. The unit will load in boot loader mode. Copy the circuit python UTF file over to the pico.
Once the pico boots as a circuit python drive copy the code onto the unit.
The unit will boot and the platform should rotate.
Unplug the unit and plug in the power supply that ship with it. Confirm that the platform rotates and does a single cycle.
Press the “top” button confirm that the “casting” animation occurs.
Press the “bottom” button confirm that it goes into “program mode”
Unplug everything the unit is ready to pack.
Fishing pole
For o gauge, cut 0.032in wire 52mm long and glue to hands.
For ho gauge, cut 0.015in wire 29mm long and glue to hands.
Paint
Paint figures with flesh color for hands and face. Red for shirt. Blue for bluejeans. Brown for hat, shoes and stripes on pole. Yellow for remaining stripes on pole.
Fishing line
Cut 15 inches of 65 test fishing line for 0 gauge or 10 inches for HO gauge. For N gauge cut 10 inches of 30 test fishing line. Silver using silver paint pen. Glue to pole at base and end. Once glue has set form an arch at the end and set with glue. Set aside to dry.
Packaging
Put 3 fishing weights in bag, put 6 M2.3 X 8 pan head screws in bag. Heat seal.
Put servo mechanism in a bag. Heat seal.
Wrap figure with padding put in bag. Heat seal.
Put controller in bag. Heat seal.
Fold up box, set power supply on right and place controller, servo, spare parts on the bottom. Place figure on top.
Print label and cut and apply instructions on the inside of the lid. Apply product label on the outside of the box.